
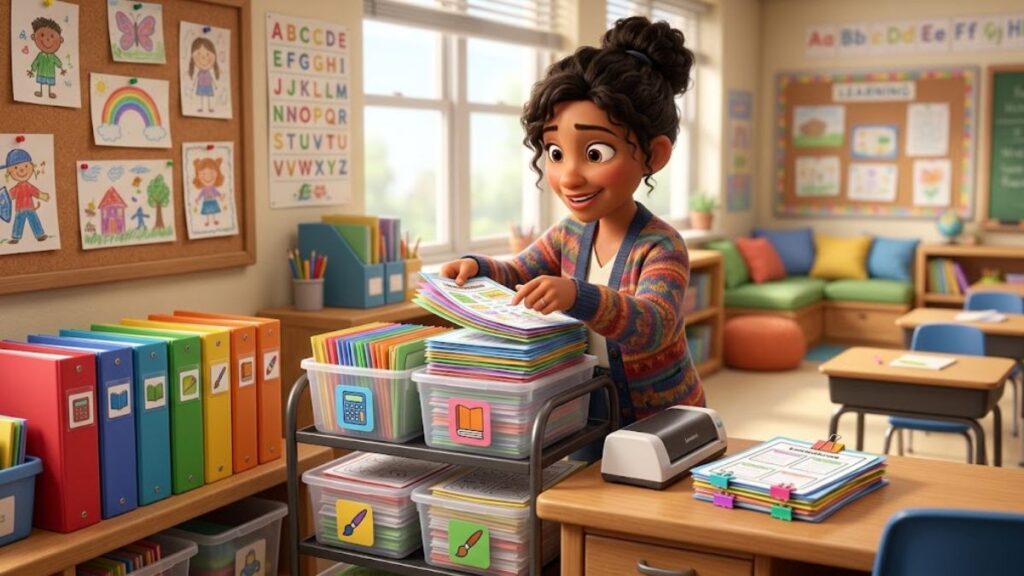
Printable worksheets can be valuable classroom resources for introducing new concepts, providing practice, reviewing previous lessons, supporting different learning levels, and assessing student understanding. However, teachers can quickly accumulate hundreds or even thousands of pages during a school year.
Without a clear system, it can become difficult to answer simple questions such as:
- Where is the worksheet I need?
- Which version should I print?
- Which students still need to complete it?
- Where is the answer key?
- Which worksheets are suitable for review?
- Which materials should be saved for next year?
A practical organization system can make worksheet preparation much easier. The goal is not to create a complicated filing system. Instead, create a simple structure that makes worksheets easy to find, print, distribute, collect, reuse, and eventually archive.
Why Should Teachers Organize Printable Worksheets?
Worksheet organization saves more than physical space. It can also save valuable preparation time.
A well-organized system helps teachers:
- Find activities quickly
- Prepare lessons faster
- Avoid printing duplicate materials
- Keep answer keys with the correct worksheets
- Track completed student work
- Support different learning levels
- Reuse high-quality resources
- Reduce unnecessary paper waste
- Prepare substitute-teacher materials
- Build a useful resource library over time
For example, if a teacher needs a Grade 3 fractions worksheet, they should ideally be able to locate an appropriate activity within a few seconds rather than searching through several boxes of unsorted papers.
How to Organize Printable Worksheets for the Classroom
Keeping classroom worksheets organized can save valuable time and reduce daily clutter. Discover simple ways to sort, label, store, and manage printable worksheets for a more efficient classroom routine.
Start With a Simple Organization Strategy
Before organizing individual worksheets, decide what information is most important to you.
A useful structure is:
Grade → Subject → Topic → Skill → Worksheet Type
For example:
Grade 3 → Math → Fractions → Equivalent Fractions → Practice
This structure makes it easier to locate a specific resource.
However, not every teacher needs to organize by grade. A teacher who works with only one class may find this simpler:
Subject → Topic → Skill
The best system is the one that matches your classroom.
1. Organize Your Digital Worksheets First
Digital organization should come before physical organization.
Your computer or cloud storage should contain the original worksheet files.
A basic structure could look like this:
Classroom Worksheets
- Math
- Reading
- Writing
- Science
- Social Studies
- Art
- Vocabulary
- Assessments
- Enrichment
- Intervention
- Homework
Inside the Math folder, you might have:
- Number Sense
- Addition
- Subtraction
- Multiplication
- Division
- Fractions
- Decimals
- Geometry
- Measurement
- Word Problems
This creates a logical structure that is easy to expand.
2. Create Folders Based on Grade Level
If you teach multiple grades, grade-level folders can prevent confusion.
For example:
Classroom Resources
→ Grade 1
→ Grade 2
→ Grade 3
→ Grade 4
→ Grade 5
Inside Grade 3:
→ Math
→ Reading
→ Writing
→ Science
This system works particularly well for teachers who teach multiple classes or create resources for several grade levels.
3. Use Consistent File Names
A good file name can make searching much easier.
Avoid vague names such as:
worksheet1.pdf
mathnew.pdf
finalworksheet.pdf
Instead, use descriptive names.
For example:
G3_Math_Fractions_EquivalentFractions_Practice.pdf
or:
Grade3_Reading_MainIdea_Worksheet.pdf
A consistent naming system means that you can search for words such as “fractions,” “main idea,” or “Grade 3” and quickly locate the correct file.
4. Include the Worksheet Type
It can be useful to indicate whether a file is:
- Practice
- Review
- Quiz
- Test
- Homework
- Enrichment
- Intervention
For example:
G2_Math_Addition_Within100_Practice.pdf
G2_Math_Addition_Within100_Review.pdf
G2_Math_Addition_Within100_Quiz.pdf
This prevents you from accidentally using an assessment when you intended to provide practice.
5. Keep Master Copies Separate
Your master worksheet should remain clean.
Do not store the only clean copy in a folder where students or teachers may write on it.
Create a dedicated area called:
MASTER COPIES
or:
ORIGINALS
Keep clean versions there.
You can then make student copies from these originals whenever necessary.
6. Organize Physical Worksheets With Binders
Binders are useful when you have a large number of printed master worksheets.
You could create:
Math Master Binder
Reading Master Binder
Writing Master Binder
Science Master Binder
Use divider tabs to separate individual topics.
For example:
Math Binder
- Numbers
- Addition
- Subtraction
- Multiplication
- Division
- Fractions
- Geometry
- Measurement
This makes physical materials much easier to browse.
7. Use Color Coding
Color coding can provide an additional visual organization system.
For example:
Math: one color
Reading: another color
Science: another color
Writing: another color
You can use the same color system for:
- Binder labels
- Folder tabs
- Storage boxes
- Digital folder icons, where available
The specific colors do not matter as much as maintaining the same system consistently.
8. Create a “This Week” Folder
One of the simplest ways to reduce daily searching is to maintain a weekly folder.
Label it:
THIS WEEK
At the beginning of the week, place the worksheets you expect to use inside.
For example:
Monday
Math practice
Reading comprehension
Tuesday
Writing activity
Science worksheet
Wednesday
Math review
Vocabulary practice
Thursday
Reading activity
Grammar practice
Friday
Weekly review
Assessment
At the end of the week, return unused worksheets to their permanent locations.
9. Create Daily Folders
If you prefer more detailed planning, use five folders:
- Monday
- Tuesday
- Wednesday
- Thursday
- Friday
Put all required worksheets and related materials into the appropriate folder.
This can be particularly useful for teachers who prepare lessons several days in advance.
10. Create a “To Print” Folder
Digital materials can also be organized according to workflow.
Create a folder called:
TO PRINT
When you select worksheets for an upcoming lesson, place them there.
After printing, move the files or mark them as completed.
You could have:
TO PRINT
PRINTED
ARCHIVE
This creates a simple workflow and reduces the chance of forgetting materials.
11. Create a “Ready to Distribute” Area
Printed worksheets should have a designated location before class.
This might be:
- A tray
- A labeled shelf
- A drawer
- A file organizer
- A classroom cart
Label it:
READY FOR STUDENTS
This prevents freshly printed materials from being mixed with old papers.
Keep Extra Copies in a Separate Location
Teachers often need additional copies unexpectedly.
A student may:
- Lose a worksheet
- Spill something on it
- Make an error and need another copy
- Join the class later
- Need additional practice
Keep a small supply in an:
EXTRA COPIES
folder or tray.
There is no need to print huge quantities. A few additional copies are often enough.
Organize Student Work by Status
Once students receive worksheets, organization becomes even more important.
Consider using four trays:
- To Complete: Work students have not finished.
- Completed: Work waiting to be checked.
- Needs Correction: Work that needs to be reviewed or corrected.
- Returned: Work that has been checked and is ready to go back to students.
This simple workflow can prevent completed papers from becoming mixed with unfinished work.
Create Individual Student Folders
For activities that need to be saved, use individual student folders.
Each folder can contain selected:
- Math work
- Writing samples
- Reading activities
- Assessments
- Projects
- Progress examples
Avoid putting every worksheet into these folders. The purpose is to maintain meaningful records rather than create another paper pile.
Use Portfolios for Progress Tracking
A portfolio can show how a student develops over time.
For example, a math portfolio might include:
- Beginning of Year: Basic number skills
- Middle of Year: Addition and subtraction
- Later: Fractions and problem solving
This gives teachers a clearer picture of progress than simply keeping a large collection of worksheets.
Organize Worksheets by Learning Objective
Instead of organizing only by topic, identify the specific skill each worksheet practices.
For example:
Math → Fractions → Identify Fractions
Math → Fractions → Compare Fractions
Math → Fractions → Equivalent Fractions
Math → Fractions → Add Fractions
This allows teachers to select worksheets based on what students need to practice.
Create Different Levels of Difficulty
A single classroom may include students working at different levels.
Consider organizing worksheets into:
- Foundation: Introduces the skill.
- Practice: Provides repeated practice.
- Challenge: Requires more complex thinking.
For example:
Fractions
- Foundation: Identify 1/2, 1/3, and 1/4
- Practice: Compare simple fractions
- Challenge: Solve fraction word problems
This allows teachers to differentiate instruction without requiring an entirely separate curriculum.
Create an Intervention Folder
Keep additional practice materials in an intervention folder.
These worksheets can be used when students need reinforcement in a specific skill.
Possible categories include:
- Number recognition
- Phonics
- Reading fluency
- Vocabulary
- Addition
- Subtraction
- Fractions
- Writing
- Grammar
This makes it easier to provide targeted practice when needed.
Create an Enrichment Folder
Some students finish regular activities quickly or need additional challenges.
An enrichment folder can contain:
- Logic puzzles
- Advanced math problems
- Creative writing prompts
- Research activities
- Reading challenges
- Brain teasers
- Problem-solving activities
This provides meaningful work without simply giving students more of the same worksheet.
Create an Early-Finisher System
An early-finisher folder can be separate from enrichment materials.
It should contain activities students can complete independently.
For example:
- Word searches
- Crossword puzzles
- Math puzzles
- Drawing prompts
- Reading activities
- Vocabulary games
- Logic challenges
Explain the system clearly so students know what they can do after completing their assigned work.
Keep Assessment Materials Separate
Do not mix quizzes and tests with ordinary practice worksheets.
Create a separate:
ASSESSMENTS
folder.
Inside, organize by subject or unit.
For example:
Math Assessments
→ Addition
→ Subtraction
→ Multiplication
→ Fractions
Reading Assessments
→ Vocabulary
→ Comprehension
→ Grammar
This makes assessment preparation easier and protects answer keys.
Store Answer Keys Carefully
Answer keys should be easy for teachers to find but difficult for students to access accidentally.
You can store them:
- Behind the master worksheet
- In a teacher-only folder
- In a separate binder
- In a digital folder
Use matching file names.
For example:
G3_Math_Fractions_Comparison_Practice.pdf
and:
G3_Math_Fractions_Comparison_Practice_Answers.pdf
Matching names make them easy to locate.
Build a Worksheet Index
If your collection becomes large, create a spreadsheet.
Useful columns include:
| Grade | Subject | Topic | Skill | Level | Type | File Name |
|---|---|---|---|---|---|---|
| 2 | Math | Fractions | Halves | Foundation | Practice | G2_Fractions_Halves.pdf |
| 3 | Math | Fractions | Equivalent Fractions | Practice | Review | G3_Fractions_Equivalent.pdf |
| 1 | Reading | Phonics | Short Vowels | Foundation | Practice | G1_Phonics_ShortVowels.pdf |
You can then filter the spreadsheet to find exactly what you need.
Add a Preview or Description
If you have hundreds of worksheets, the file name may not tell you everything.
Add a short description to your index.
For example:
“Students identify fractions represented by shaded shapes.”
This makes selecting the right worksheet faster.
Organize by Teaching Sequence
Some teachers find it more useful to organize materials according to the order they teach concepts.
For example:
Fractions Unit
- Whole and parts
- Equal parts
- Halves
- Fourths
- Thirds
- Fraction notation
- Number lines
- Comparing fractions
- Equivalent fractions
- Fraction operations
This approach can make lesson planning much easier.
Protect Frequently Used Worksheets
Some worksheets are useful year after year.
Place these in:
- Sheet protectors
- Laminated sleeves
- Plastic folders
If appropriate, students can complete them using dry-erase markers and the teacher can reuse the same resource.
This works especially well for:
- Letter tracing
- Number formation
- Basic math facts
- Matching activities
- Sight words
- Vocabulary practice
Use Worksheet Stations
Instead of printing a worksheet for every student every time, some activities can be turned into stations.
For example:
- Station 1: Math facts
- Station 2: Reading comprehension
- Station 3: Vocabulary
- Station 4: Writing
Students rotate through the stations.
This can reduce paper consumption while supporting independent learning.
Reduce Unnecessary Printing
Organization can also help with sustainability.
Before printing, ask:
Do every student need a copy?
Some materials may work better as:
- Group activities
- Projected examples
- Classroom stations
- Reusable laminated activities
- Shared reference sheets
Printing only what is necessary can reduce both cost and clutter.
Prepare a Substitute Teacher Folder
A substitute teacher should not have to search through hundreds of worksheets.
Create a dedicated folder containing:
- Lesson plans
- Worksheets
- Answer keys
- Classroom instructions
- Student routines
- Emergency information as appropriate
- Instructions for collecting work
Label everything clearly.
Create a School-Year Archive
At the end of the school year, separate materials into:
- Keep: Reusable resources.
- Archive: Materials you may need later.
- Update: Worksheets that need corrections or improvements.
- Recycle: Unnecessary duplicates or outdated materials.
This prevents the next school year from starting with the previous year’s paper clutter.
Keep Digital Backups
Physical worksheets can be lost, damaged, or misplaced.
Maintain digital copies of important materials.
A simple structure could be:
2026-27 School Year
→ Grade 3
→ Math
→ Fractions
→ Equivalent Fractions
If your school uses cloud storage, follow the school’s policies for storing educational materials and student information.
Review Your Collection Regularly
Do not wait until the end of the school year to organize everything.
A short monthly review can be enough.
Check for:
- Duplicate worksheets
- Outdated activities
- Missing answer keys
- Damaged master copies
- Incorrect files
- Worksheets that students consistently find too easy or too difficult
Regular maintenance prevents the collection from becoming overwhelming.
A Practical Classroom Worksheet Workflow
A simple workflow could look like this:
Step 1: Find or create the worksheet.
↓
Step 2: Save the digital master using a clear file name.
↓
Step 3: Place it in the appropriate subject/topic folder.
↓
Step 4: Add the answer key.
↓
Step 5: Place the worksheet in the “To Print” folder.
↓
Step 6: Print the required number of copies.
↓
Step 7: Move printed copies to the “Ready for Students” tray.
↓
Step 8: Distribute the worksheet.
↓
Step 9: Collect completed work.
↓
Step 10: Sort into “Completed,” “Needs Review,” or “Returned.”
This creates a repeatable system rather than relying on random paper piles.
Example of a Complete Worksheet Organization System
A teacher might use the following structure:
Digital Library
Classroom Resources
- Grade 1
- Grade 2
- Grade 3
Inside Grade 3
- Math
- Reading
- Writing
- Science
- Assessments
- Enrichment
- Intervention
Inside Math
- Addition
- Subtraction
- Multiplication
- Division
- Fractions
- Geometry
- Measurement
Inside Fractions
- Introduction
- Halves and Fourths
- Fraction of a Set
- Number Lines
- Comparing Fractions
- Equivalent Fractions
- Addition
- Word Problems
Physical Storage System
A matching physical system could include:
Binder 1: Math Masters
Binder 2: Reading Masters
Binder 3: Writing Masters
Binder 4: Science Masters
Folder 1: This Week
Folder 2: Extra Copies
Folder 3: Intervention
Folder 4: Enrichment
Folder 5: Assessments
Tray 1: To Complete
Tray 2: Completed
Tray 3: Needs Review
Tray 4: Returned
The system can be adjusted according to the size of your classroom and the number of subjects you teach.
How to Organize Worksheets for Kindergarten
Kindergarten materials often benefit from broad categories.
Literacy
- Alphabet
- Letter Recognition
- Phonics
- Beginning Sounds
- Sight Words
- Pre-Writing
Math
- Numbers
- Counting
- Shapes
- Patterns
- Measurement
- Simple Addition
- Simple Subtraction
Other
- Fine Motor
- Coloring
- Science
- Seasonal Activities
Because kindergarten worksheets often include visual activities, large labeled folders can be easier to manage than highly detailed filing systems.
How to Organize Elementary Worksheets
Elementary teachers may benefit from a more skill-based system.
For example:
Math → Fractions → Comparing Fractions
Reading → Comprehension → Main Idea
Writing → Grammar → Parts of Speech
This makes it easier to match a worksheet to a specific lesson objective.
How to Organize Middle School Worksheets
For older students, organization can become more topic-specific.
For example:
Grade 7 Math
→ Integers
→ Algebraic Expressions
→ Equations
→ Geometry
→ Ratios
→ Probability
For science:
Grade 7 Science
→ Cells
→ Ecosystems
→ Matter
→ Energy
→ Earth Science
This structure works well when students need targeted practice.
Common Worksheet Organization Mistakes
Even the best worksheets can become difficult to manage when organization is overlooked. Learn about common worksheet organization mistakes and simple ways to keep classroom materials sorted, accessible, and easy to use.
Creating Too Many Folders
A system with dozens of tiny categories can become difficult to maintain.
Start broad and create additional categories only when necessary.
Using Unclear File Names
Names such as “worksheet2” make digital searching difficult.
Use descriptive names.
Mixing Student Work With Masters
Keep clean masters separate.
Printing Too Many Copies
Print according to actual classroom needs.
Keeping Every Student Worksheet
Routine practice does not always need long-term storage.
Forgetting Answer Keys
Keep answer keys clearly connected to the correct activity.
Never Cleaning the Collection
A filing system becomes less useful when outdated resources accumulate.
Final Thoughts
Learning how to organize printable worksheets for the classroom is ultimately about creating a reliable workflow. Teachers should be able to move from finding a resource to printing it, distributing it, collecting it, reviewing it, and storing it without unnecessary searching.
A strong system usually combines digital folders, physical binders, weekly preparation folders, student-work trays, assessment storage, and clear file names.
For larger collections, organize worksheets by grade, subject, topic, skill, level, and purpose. Keep clean master copies separate from student copies, store answer keys securely, and maintain digital backups of valuable resources.
It is also important to avoid over-organizing. A system that looks perfect but takes too much time to maintain will eventually break down. Start with a few practical categories and expand only when your collection requires it.
The best worksheet organization system is one that helps you answer three questions quickly:
What do I need?
Where is it?
What should I do with it after the lesson?
When those questions have clear answers, managing printable worksheets becomes much easier, classroom preparation becomes more efficient, and teachers can spend more time focusing on student learning rather than managing paper.
