
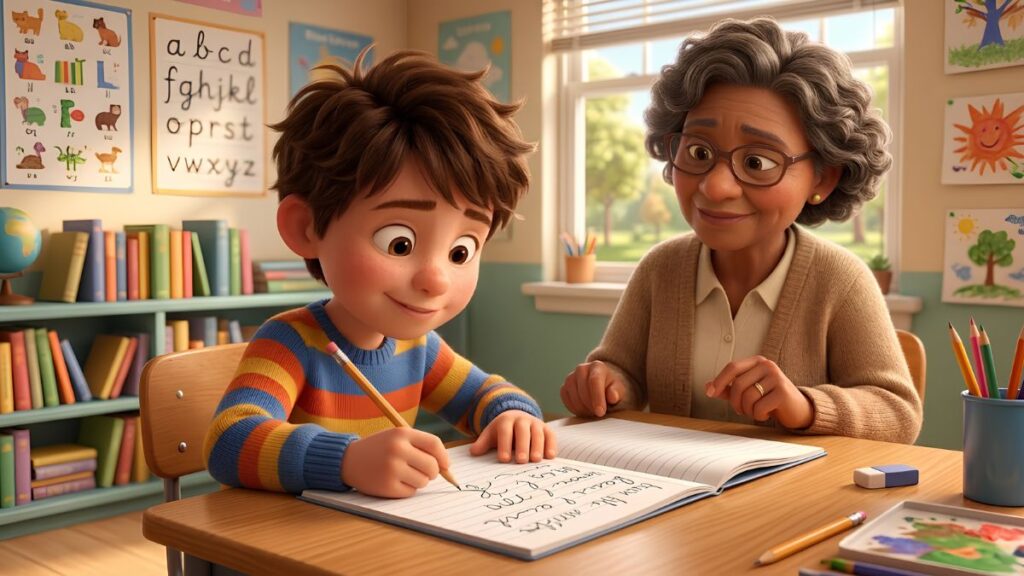
How to Teach Cursive Writing to A Left Handed Child can require a slightly different approach from teaching a right-handed child.
Because left-handed writers move their hand across the page from left to right while their hand naturally approaches the writing they have already produced, they may experience smudging, awkward wrist positions, difficulty seeing the letters, or discomfort if they are encouraged to copy a right-handed writing posture.
The goal of How to Teach Cursive Writing to A Left Handed Child is not to make a left-handed child write exactly like a right-handed child.
Instead, handwriting instruction should help the child develop comfortable letter formation, appropriate paper positioning, good pencil control, consistent spacing, and readable cursive writing.
Teachers and parents can make the learning process easier by allowing the child to experiment with paper placement, writing angle, and hand position.
Tilting the paper slightly and keeping it positioned comfortably can help the child see the words while reducing unnecessary wrist bending. A suitable pencil grip and relaxed hand pressure can also make longer writing sessions more comfortable.
It is also helpful to begin with short practice sessions rather than expecting a child to write several lines of cursive at once.
Start with individual strokes and letters, then move to simple letter connections, words, and eventually short sentences. Tracing, air writing, and writing on lined paper can provide additional practice without making the child feel overwhelmed.
With the right setup, patient instruction, and plenty of short, positive practice sessions, left-handed children can develop fluent and comfortable cursive handwriting.
The focus should always be on comfort, control, consistency, and legibility, rather than making the child’s handwriting look identical to that of a right-handed writer.
Why Cursive Writing Can Be Different for Left-Handed Children
Most cursive writing systems are designed around movement from left to right. A left-handed child may naturally position the hand differently because the hand can cover the letters that have just been written.
Common challenges can include:
- Covering the writing with the hand
- Smearing wet ink or pencil marks
- Bending the wrist excessively
- Pushing the pencil rather than pulling it
- Difficulty maintaining consistent letter size
- Trouble seeing the writing line
- Fatigue during longer writing sessions
- Awkward paper positioning
- Difficulty copying cursive models designed for right-handed writers
These challenges do not mean that a child cannot learn cursive. They simply mean that positioning and technique deserve particular attention.
How to Teach Cursive Writing to A Left Handed Child
Teaching cursive to a left-handed child can require a few thoughtful adjustments. Learn how proper paper positioning, pencil grip, posture, letter formation, and practice can make cursive writing more comfortable and confident.
Start With a Comfortable Sitting Position
Before teaching individual letters, establish a comfortable writing position.
The child should generally:
- Sit with both feet supported.
- Keep the shoulders relaxed.
- Sit close enough to the desk without leaning excessively.
- Keep the writing arm comfortably supported.
- Use the non-writing hand to stabilize the paper.
Avoid forcing the child into a rigid posture.
The best position is one that allows the child to write comfortably while maintaining control.
Position the Paper Correctly
Paper positioning is particularly important for left-handed writers.
Instead of placing the paper completely straight, many left-handed children benefit from slightly rotating the paper clockwise.
This can help the hand move more naturally across the page and reduce the need to bend the wrist sharply.
A useful starting position is:
Paper slightly rotated clockwise → writing hand below the writing line → forearm moving naturally across the page.
However, children differ. Experiment with small adjustments rather than insisting on one exact angle.
Keep the Writing Hand Below the Line
One of the most important goals is to avoid an extreme “hooked” wrist position.
A hooked position occurs when the wrist bends sharply above the writing line and the hand moves over the words.
Instead, encourage the child to keep the writing hand below the line of writing when comfortable.
This can improve visibility and reduce awkward wrist movement.
However, some children naturally use a slightly hooked position. Do not force a dramatic change if it causes discomfort. The priority should be comfortable and functional writing.
Move the Paper Instead of Twisting the Wrist
As the child writes across the page, the paper can gradually be adjusted.
Rather than bending the wrist to reach the next part of the line, encourage the child to keep the hand and forearm relatively comfortable while allowing the paper position to support the movement.
This can be especially useful during longer cursive exercises.
Use a Suitable Pencil Grip
A comfortable tripod or modified tripod grip can work well for many children.
The goal is to allow:
- Controlled finger movement
- A relaxed hand
- Comfortable pencil pressure
- Adequate visibility of the writing
Avoid forcing the fingers into an uncomfortable position simply because it looks different from another child’s grip.
If the child experiences persistent discomfort or significant difficulty with pencil control, an occupational therapist can help assess the writing posture and grip.
Choose the Writing Tool Carefully
Some writing materials are more forgiving for left-handed writers than others.
For early practice, consider:
- Pencils
- Dry-erase markers
- Fine-tip markers
- Smooth-writing pens
If ink is being used, quick-drying ink can reduce smearing.
A pencil can be particularly useful during early practice because the child can erase mistakes without waiting for ink to dry.
Avoid Excessive Pencil Pressure
Left-handed children may sometimes push the pencil across the paper rather than pull it.
This can lead to increased pressure.
Encourage a relaxed grip and comfortable pressure.
A simple activity is to ask the child to draw:
Very light lines → medium lines → normal writing lines
The purpose is to help the child become aware of how much pressure they are using.
Begin With Basic Cursive Movements
Before introducing complete words, practice the movements used in cursive.
Examples include:
- Upstrokes
- Downstrokes
- Curves
- Loops
- Humps
- Waves
- Connecting strokes
For example:
- u u u u
- m m m m
- c c c c
These movements help establish control before the child has to remember complete letter formations.
Teach Letters by Formation Pattern
Instead of teaching cursive letters strictly in alphabetical order, group letters with similar movements.
For example, a teacher might begin with letters that use similar curved movements:
c, a, d, g
Another group could include:
i, t, u, w
The exact sequence should follow the cursive handwriting system being taught.
The important idea is to practice related movements together.
Demonstrate the Starting Point Clearly
Left-handed children can benefit from very clear visual models.
Show:
- Where the letter begins
- Which direction the pencil moves
- Where the letter finishes
- How the next letter connects
Use arrows when necessary.
For example:
Start → curve → upstroke → downstroke → exit stroke
A consistent formation pattern is more useful than repeatedly copying a finished letter without understanding how it was made.
Use Large Cursive Letters First
Large letters allow children to focus on movement rather than tiny pencil control.
Start with:
- Air writing
- Whiteboard writing
- Large paper
- Finger tracing
Then gradually move toward smaller letters.
A possible progression is:
Large movement → medium letter → regular handwriting size
Practice Air Writing
Ask the child to form a cursive letter in the air using the entire arm.
For example:
“Make a large cursive c.”
Then repeat the movement while saying:
“Start here, curve around, and finish here.”
Air writing can help the child learn the movement pattern before picking up a pencil.
Try Finger Tracing
Print large cursive letters on paper.
Ask the child to trace each letter with a finger.
Encourage them to pay attention to:
- Starting point
- Direction
- Curves
- Exit stroke
After tracing, they can attempt the letter with a pencil.
Use Tactile Practice
Cursive letters can also be practiced using:
- Sand trays
- Salt trays
- Finger paint
- Raised-letter cards
- Textured surfaces
The child traces the letter while saying its name.
This provides additional sensory feedback and can make the formation pattern easier to remember.
Teach Connections Explicitly
One of the biggest differences between manuscript and cursive writing is that letters are connected.
Do not assume that a child will automatically understand how to connect them.
Practice:
a → b
c → h
i → n
Then move to short combinations:
- an
- in
- at
- ch
The exact connections depend on the handwriting style being taught.
Move From Letters to Short Words
Once individual letters and connections are reasonably comfortable, introduce short words.
Examples:
- cat
- sun
- hat
- run
- fish
- book
The goal is not to produce pages of writing.
Instead, have the child write a small number of words carefully and comfortably.
Use Trace, Copy, Write
A useful progression is:
- Trace: The child follows the cursive model.
- Copy: The child looks at the model and reproduces it.
- Write: The child writes the word without the model.
For example:
- Trace: hello
- Copy: hello
- Write: hello
Gradually reduce the amount of visual support.
Use Cursive Models That Are Easy to See
Avoid handwriting examples that are:
- Extremely small
- Highly decorative
- Difficult to distinguish
- Overly complicated
- Crowded together
Choose a clear cursive style with obvious starting points and connections.
This is particularly important when teaching children who are still developing visual-motor skills.
Keep Writing Lines Clear
Use paper with clearly defined writing lines.
The child needs to understand where:
- The main body of the letter sits
- Tall letters extend upward
- Descenders extend downward
Different handwriting programs use different terminology, so use the language that matches the curriculum.
Teach Letter Size
Cursive writing can become difficult to read if letter sizes vary dramatically.
Practice groups such as:
- Small letters: a, c, e, i, m, n, o, r, s, u, v, w, x
- Tall letters: b, d, f, h, k, l, t
- Descending letters: g, j, p, q, y
The exact classification can vary depending on the handwriting style.
Practice Spacing Between Words
Once children begin writing words, teach consistent word spacing.
A simple strategy is to use a finger or small spacing card.
For example:
The [space] cat [space] ran.
As the child becomes more comfortable, gradually reduce reliance on the spacing tool.
Use Short Practice Sessions
Cursive handwriting can be tiring, especially when the child is learning a new motor pattern.
Instead of a long handwriting session, use short periods such as:
- 5 minutes: Movement practice
- 5 minutes: Letter formation
- 5 minutes: Word practice
- 5 minutes: Short sentence
The appropriate amount depends on the child’s age and individual needs.
Introduce Sentences Gradually
Once words become comfortable, move to short sentences.
Examples:
- I like cats.
- The sun is hot.
- We went home.
Keep sentences short enough that the child can concentrate on cursive formation and connections.
Avoid Making Speed the Main Goal
A child who is learning cursive should not be expected to write quickly immediately.
Focus first on:
- Comfortable posture
- Correct formation
- Consistent connections
- Legibility
- Fluency
- Speed
Speed can develop naturally with practice.
Practice With Familiar Words
Use words the child already knows.
Examples include:
- Their name
- Family names
- Favorite animals
- Classroom objects
- Favorite foods
- Common sight words
Familiar vocabulary allows the child to focus more attention on handwriting.
Use Whiteboards for Practice
Whiteboards are useful because mistakes can be erased easily.
Children can practice:
- Large cursive letters
- Letter connections
- Short words
- Short sentences
The reduced pressure can encourage experimentation and repetition.
Teach Cursive in Small Groups
If several students are learning cursive, a small-group lesson can make it easier to demonstrate the specific positioning needed by left-handed writers.
The teacher can observe:
- Paper angle
- Wrist position
- Pencil grip
- Letter formation
- Spacing
Individual adjustments can then be made without interrupting the whole class.
Give the Child a Visual Reference
Keep a small cursive alphabet nearby.
The reference can show:
- Uppercase letters
- Lowercase letters
- Starting points
- Arrows
- Connections
This allows the child to check a letter independently instead of repeatedly asking how to form it.
Correct One Issue at a Time
Avoid correcting every aspect of handwriting simultaneously.
For example, one practice session may focus on: Letter formation
- Another: Spacing
- Another: Letter size
- Another: Connections
This makes feedback easier to understand.
Give Specific Feedback
Instead of: “Make your handwriting neater.”
try: “Your letters are sitting nicely on the line.”
or: “Your spacing between words is very clear.”
For improvement: “Let’s work on keeping the lowercase letters the same height.”
Specific feedback gives the child a clear goal.
Watch for Wrist or Hand Discomfort
Handwriting should not consistently cause pain.
Pay attention if a child frequently:
- Complains of hand pain
- Shakes or stretches the hand
- Presses extremely hard
- Avoids writing
- Becomes unusually fatigued
- Develops a very extreme wrist position
Persistent discomfort is a reason to discuss the child’s handwriting needs with a qualified professional, such as an occupational therapist.
Allow Alternative Writing Methods When Appropriate
Learning cursive does not mean every school task needs to be completed in cursive.
For assignments where the goal is to demonstrate knowledge rather than handwriting skill, children may sometimes benefit from:
- Print handwriting
- Typing
- Dictation
- Speech-to-text
This can prevent handwriting difficulty from interfering with learning in other subjects.
A Simple Cursive Lesson Plan
A 20-minute lesson could look like this:
- 3 Minutes: Warm-Up – Practice curves, loops, and connecting movements.
- 5 Minutes: Teacher Demonstration – Show one or two letters and explain the movement.
- 5 Minutes: Guided Practice – Students trace and copy the letters.
- 5 Minutes: Word Practice – Write three to five short words.
- 2 Minutes: Review – Discuss one thing the student did well and one skill to practice next.
Sample Weekly Cursive Plan
| Day | Focus |
|---|---|
| Monday | Basic cursive movements |
| Tuesday | Two or three target letters |
| Wednesday | Letter connections |
| Thursday | Short words |
| Friday | Short sentences and review |
The pace can be slowed or adjusted depending on the child’s progress.
Common Mistakes to Avoid
- Forcing a Right-Handed Posture: Left-handed children do not need to imitate the exact posture of right-handed writers.
- Forcing the Wrist Into a Specific Position: The goal is comfortable, functional writing rather than a particular appearance.
- Using Large Amounts of Copying: Writing pages of repeated words can cause fatigue without necessarily improving technique.
- Focusing on Speed Too Early: Fluency should develop after the child has established comfortable and consistent formation.
- Using Complicated Cursive Styles: A simple, readable style is usually easier for beginners.
- Correcting Everything at Once: Focus on one or two specific skills during each practice session.
Final Thoughts
Learning cursive writing can be completely achievable for a left-handed child when instruction takes their natural writing movement into account. The most important areas to address are paper positioning, comfortable posture, pencil control, clear letter formation, spacing, and gradual practice.
Rather than trying to make a left-handed child write exactly like a right-handed child, focus on developing a writing position that is comfortable, efficient, legible, and sustainable.
Start with large movements and individual letters, move gradually to connections and short words, and eventually introduce sentences. Keep practice sessions short, provide clear visual models, and give specific positive feedback.
Most importantly, treat left-handedness as a normal variation in writing style. With appropriate positioning, patience, and consistent practice, children can develop cursive writing skills while maintaining a comfortable and natural writing technique.
