
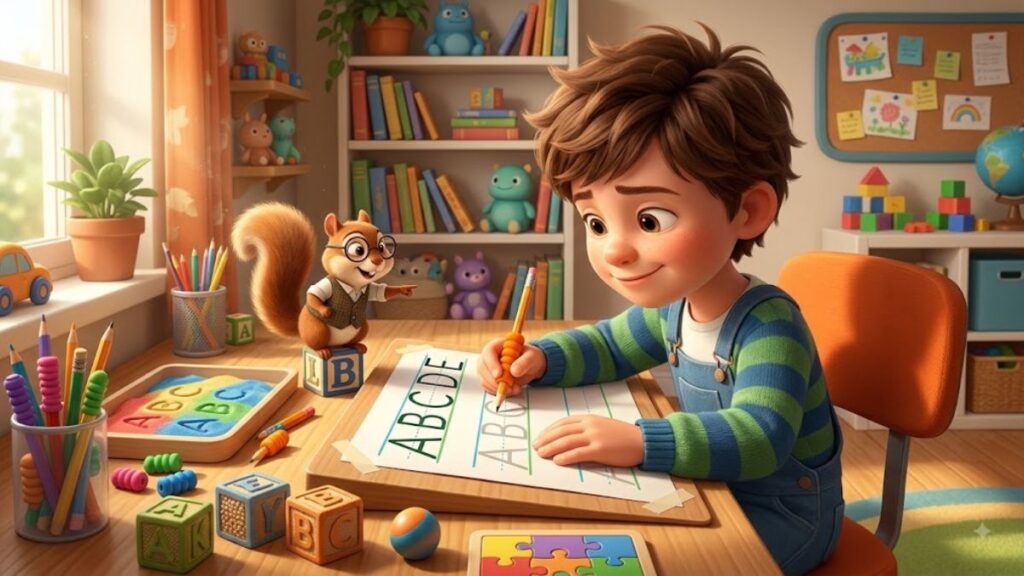
Handwriting can be a significant challenge for children with dysgraphia. A student may understand a lesson, have creative ideas, and know exactly what they want to say, yet struggle to communicate those ideas on paper. Difficulties may involve letter formation, spacing, pencil control, writing speed, alignment, or organizing written work.
Effective handwriting practice techniques for dysgraphia should therefore focus on building practical writing skills without creating unnecessary frustration. The goal is not perfect handwriting. Instead, students should work toward comfortable, readable, increasingly fluent handwriting while having appropriate alternatives when handwriting is not the focus of a lesson.
Because dysgraphia can affect students differently, a strategy that works well for one child may not work equally well for another. Teachers and families should observe the student’s specific difficulties and adjust practice accordingly.
What Is Dysgraphia?
Dysgraphia is a learning difficulty that can affect handwriting and written expression. It may make it difficult for a student to coordinate the physical and cognitive processes involved in writing.
Students may experience difficulties with:
- Forming letters correctly
- Remembering how letters are formed
- Maintaining consistent letter size
- Keeping letters on the line
- Spacing words
- Holding or controlling a pencil
- Applying appropriate pencil pressure
- Writing at a reasonable speed
- Copying from a board or book
- Writing numbers
- Spelling while writing
- Organizing written ideas
A student with dysgraphia is not necessarily struggling with the academic concept being taught. The difficulty may be with the process of putting the answer into written form.
Why Traditional Handwriting Practice May Not Be Enough
Traditional handwriting worksheets often ask students to trace or copy the same letters repeatedly.
While repetition can be useful, simply increasing the amount of writing may not address the specific difficulty.
For some students, excessive practice can lead to:
- Hand fatigue
- Frustration
- Reduced concentration
- Poorer handwriting toward the end of the activity
- Avoidance of writing
- Negative feelings about schoolwork
Instead, practice should be short, targeted, and purposeful.
If a child struggles with spacing, for example, spending 20 minutes practicing letter formation may not address the main problem.
Handwriting Practice Techniques for Dysgraphia
Handwriting can be challenging for children with dysgraphia, but the right practice techniques can make writing more comfortable and manageable. Explore simple strategies that build confidence, control, and writing skills.
Start With an Individual Handwriting Goal
Before beginning handwriting practice, identify the most important skill to work on.
Possible goals include:
- Goal 1: Improve lowercase letter formation.
- Goal 2: Keep letters on the baseline.
- Goal 3: Develop more consistent spacing.
- Goal 4: Improve pencil control.
- Goal 5: Increase writing endurance.
- Goal 6: Improve writing speed while maintaining readability.
Choose one or two goals at a time rather than trying to correct every aspect of handwriting simultaneously.
Check Pencil Grip and Comfort
A functional pencil grip can make writing more comfortable.
Encourage the student to hold the pencil in a relaxed, controlled manner. Many students use a grip involving the thumb, index finger, and middle finger, but there is not one single grip that every student must use.
Pay attention to signs such as:
- Excessive squeezing
- White knuckles
- Frequent shaking of the hand
- Complaints of pain
- Very heavy pencil pressure
- Changing grip repeatedly
If writing consistently causes discomfort or significant fatigue, additional professional guidance may be helpful.
Adjust the Writing Environment
Sometimes small environmental changes can make handwriting easier.
Consider:
- A comfortable chair and table height
- Feet supported on the floor or a footrest
- Adequate lighting
- A stable writing surface
- Appropriate paper size
- A comfortable pencil
- Reduced visual distractions
A student should not have to constantly adjust their body position just to write.
Experiment With Paper Position
Paper does not necessarily need to be perfectly straight.
Some students write more comfortably when the paper is slightly angled.
The important objective is to find a position that allows the student to:
- See the writing clearly
- Move the hand naturally
- Keep the wrist reasonably comfortable
- Avoid excessive twisting
Allow the child to experiment rather than forcing one position.
Use the Concrete-Pictorial-Written Progression
For letter formation, students can benefit from moving through several stages.
Stage 1: Feel
Trace or form the letter using a finger.
Stage 2: See
Look at a clear letter model with a starting point and arrows.
Stage 3: Move
Practice the movement in the air or on a large surface.
Stage 4: Write
Write the letter with a pencil.
This gives students multiple cues for remembering the movement.
Practice Large Letter Movements
Some children find it easier to learn letter movements on a larger scale.
Try:
- Air writing
- Whiteboard writing
- Large paper
- Finger tracing
- Writing on a vertical surface
For example, the teacher can demonstrate a large lowercase a, emphasizing where the movement begins and how it finishes.
Once the movement becomes familiar, gradually reduce the size.
Use Air Writing
Air writing is a simple activity that requires no paper.
Ask the student to use an index finger to form a letter in the air.
For example:
“Start at the top, go down, curve around, and finish here.”
Students can also say the steps aloud while making the movement.
This provides a visual, motor, and verbal connection.
Use Multisensory Letter Practice
Multisensory handwriting activities can give students more than one way to remember letter formation.
Try:
- Tracing letters with a finger
- Forming letters with clay
- Drawing letters on a whiteboard
- Tracing textured letters
- Writing letters in sand
- Building letters with sticks
- Saying formation steps aloud
The activity should remain purposeful rather than becoming a sensory activity without a connection to handwriting.
Teach Letter Formation Explicitly
Do not assume students automatically know how letters should be formed.
Demonstrate:
- Where to start
- Which direction to move
- Where to stop
- How to connect the strokes
For example:
“Start at the top, move down, then curve back around.”
Use the same language consistently.
Group Letters by Similar Movements
Teaching letters in a logical formation sequence can reduce the number of new motor patterns students must learn.
For example, letters that involve similar strokes can be practiced together.
The exact grouping should follow the handwriting style used in the student’s classroom.
The goal is to help students recognize that certain letters use familiar movement patterns.
Use Tracing as a Temporary Support
Tracing can help introduce letter formation.
However, students should gradually move beyond tracing.
Use:
Trace → Copy → Independent writing
For example:
Step 1
Trace m.
Step 2
Copy m beside the model.
Step 3
Write m without looking at the model.
This gradual progression builds independence.
Practice Problem Letters Separately
If a student consistently struggles with a specific letter, provide additional targeted practice.
For example:
g g g g
Then: go
Then: green
Then: The grass is green.
This gives the student repeated exposure while gradually increasing the writing demand.
Move From Letters to Short Words
Once individual letters are becoming more consistent, practice them in simple words.
For example:
- cat
- mat
- sat
- map
Short words are useful because students can focus on handwriting without becoming overwhelmed by lengthy writing.
Practice Common Words
Students need to write certain words frequently.
Practice words such as:
- the
- and
- is
- are
- was
- have
- this
- that
- because
- school
Rather than writing each word dozens of times, use them in short phrases and sentences.
For example:
This is my book.
This makes practice more functional.
Teach Spacing Explicitly
Some children with dysgraphia may write words too close together or leave inconsistent spaces.
A temporary spacing tool can help.
Students might use:
- A finger
- A small card
- A craft stick
- A visual spacing marker
The goal is to develop a consistent internal sense of word spacing so the tool can eventually be removed.
Use Specially Adapted Paper
Different types of paper may provide different levels of support.
Consider:
- Wide-ruled paper
- Paper with highlighted baselines
- Paper with a middle guideline
- Raised-line paper
- Large writing spaces
- Graph paper
For example, a highlighted baseline can help a student understand where letters should sit.
Use Visual Boxes for Letter Size
If students struggle with making letters too large or too small, writing boxes can provide a clear boundary.
Initially:
One letter = one box
As the student’s control improves, reduce the amount of visual support.
The goal is not to force perfectly identical letters but to develop more consistent and readable writing.
Practice Basic Strokes
Some students benefit from practicing basic movements before complex letters.
Examples include:
- Straight lines
- Curves
- Circles
- Loops
- Diagonal strokes
These movements can then be connected to actual letter formation.
Keep this practice brief and purposeful.
Use Whiteboards for Practice
Whiteboards offer a larger writing surface and allow students to erase mistakes easily.
They can be useful for:
- Letter formation
- Number formation
- Short words
- Spelling practice
- Sentence writing
A larger writing surface may also make it easier to practice movement before transitioning to smaller paper writing.
Practice Numbers Separately
Handwriting difficulties can affect numbers as well.
Students may reverse numbers, struggle with formation, or have difficulty keeping numbers aligned.
Practice:
- Number formation
- Number size
- Spacing
- Alignment
This is particularly important during mathematics because poorly aligned numbers can lead to calculation errors.
Use Graph Paper for Mathematics
Graph paper can help students keep mathematical work organized.
For example, students can place one digit in each square when solving:
345 + 278
This can make place-value alignment more visible.
Graph paper can also help with:
- Multiplication
- Long division
- Fractions
- Coordinate grids
- Geometry
Use Short Copying Exercises
Copying can provide useful handwriting practice, but keep the amount manageable.
Instead of asking a student to copy an entire paragraph, provide one or two sentences.
For example:
The sun is shining today.
Focus on one specific skill, such as spacing or letter size.
Use Dictation Gradually
Dictation can help students practice writing without relying entirely on visual copying.
Start with:
Individual letters
Then: Short words
Then: Short phrases
Finally: Simple sentences
Give students enough time to process the instruction and write.
Use Sentence Frames
Students with dysgraphia may struggle to write both the content and the physical letters at the same time.
Sentence frames can reduce the writing load.
For example:
I like ______ because ______.
or:
My favorite animal is ______. It can ______.
The student can focus on producing meaningful writing while practicing handwriting.
Separate Handwriting From Content Assessment
If the objective of an assignment is to test science, history, or reading comprehension, handwriting should not automatically determine the student’s grade.
Depending on the student’s needs, alternatives can include:
- Typing
- Speech-to-text
- Oral answers
- Scribing
- Reduced writing requirements
This allows the student to demonstrate academic understanding while continuing to practice handwriting separately.
Use Functional Writing
Handwriting practice becomes more meaningful when students use it for real purposes.
Activities can include:
- Writing a shopping list
- Making a greeting card
- Labeling a drawing
- Writing a short note
- Creating a classroom sign
- Writing a journal entry
- Making a simple checklist
Functional activities can make handwriting feel less like repetitive drill work.
Build Writing Endurance Slowly
Some students can write neatly for a few minutes but experience significant deterioration after longer periods.
Start with a manageable amount.
For example:
5 minutes → 7 minutes → 10 minutes
Increase gradually while monitoring comfort and legibility.
If handwriting quality suddenly deteriorates, the student may need a break rather than additional practice.
Use Movement Breaks
Short movement breaks can help students return to writing with better attention and comfort.
Between activities, students might:
- Stretch their fingers
- Shake out their hands gently
- Stand up
- Walk briefly
- Change activities
Avoid treating hand exercises as a punishment or requiring excessive repetition.
Encourage Self-Monitoring
Students should gradually learn to evaluate their own handwriting.
Ask them to check:
- Did I start my letters correctly?
- Are my letters on the line?
- Did I leave spaces?
- Are my letters a similar size?
- Can someone else read what I wrote?
This develops independence instead of making the teacher responsible for correcting every mistake.
Create a Simple Handwriting Checklist
A child-friendly checklist could include:
My Handwriting Check
☐ My letters are readable.
☐ My words have spaces.
☐ My letters are mostly on the line.
☐ I used the correct letter shapes.
☐ I checked my work.
Only include the skills that are currently being taught.
Provide Specific Feedback
General comments such as “Write more neatly” are often not helpful.
Instead, provide specific feedback.
For example:
- “Your spaces between words are much clearer here.”
- “You started this letter at the correct point.”
- “Your numbers are aligned better in this problem.”
Specific feedback tells students exactly what they should continue doing.
Avoid Excessive Rewriting
If a student makes several handwriting mistakes, do not automatically require them to rewrite the entire page.
Instead, identify one area for improvement.
For example:
“Let’s practice this letter three more times, then continue.”
This keeps practice focused and prevents handwriting from becoming associated with punishment.
Focus on Legibility Rather Than Perfection
The goal should be functional handwriting.
Ask
- Can the student read their writing?
- Can a teacher understand it?
- Can the student complete classroom tasks?
- Can the student write without excessive discomfort?
- Is the handwriting becoming more consistent?
Perfect handwriting is not necessary for successful learning.
Use Technology as an Appropriate Support
Technology can reduce writing demands when handwriting is not the purpose of the assignment.
Students may use:
- Keyboarding
- Speech-to-text
- Digital worksheets
- Audio responses
- Typing for longer assignments
These supports allow students to demonstrate their knowledge while handwriting skills continue to develop.
Consider Occupational Therapy Support
If handwriting difficulties are significantly affecting classroom participation, families and educators may consider seeking guidance from an occupational therapist or another qualified professional.
An occupational therapist can assess functional handwriting and related motor skills and may suggest individualized strategies.
The goal should be to identify the student’s specific needs rather than assuming that all students with dysgraphia need the same exercises.
A 10-Minute Handwriting Practice Routine
A short daily routine can be more manageable than a long handwriting session.
Warm-Up: 2 Minutes
Practice simple lines, curves, or letter movements.
Target Letters: 2 Minutes
Practice one or two specific letters.
Words: 2 Minutes
Use the letters in short words.
Sentence: 2 Minutes
Write one short sentence.
Self-Check: 2 Minutes
Review:
- Letter formation
- Spacing
- Alignment
- Legibility
This routine provides repetition without requiring an exhausting handwriting session.
Example Weekly Practice Plan
Monday: Letter Formation
Focus on one or two difficult letters.
Tuesday: Letter Connections
Use the target letters in short words.
Wednesday: Spacing
Practice writing short phrases with clear spaces.
Thursday: Alignment
Practice keeping letters on the baseline.
Friday: Functional Writing
Use the week’s skills to write a short note, caption, list, or sentence.
This gives students repeated practice while keeping each session focused.
Common Mistakes to Avoid
- Making Students Copy Pages of Text: More writing does not automatically mean better handwriting.
- Correcting Every Mistake: Focus on the current target skill.
- Forcing One Pencil Grip: Prioritize comfort and functional control.
- Comparing Students: Handwriting development varies considerably.
- Using Handwriting as Punishment: This can make students more resistant to writing.
- Expecting Immediate Improvement: Handwriting skills often develop gradually.
- Ignoring Fatigue: Poorer handwriting after prolonged writing may indicate that the student needs a break or reduced writing demand.
Final Thoughts
Effective handwriting practice techniques for dysgraphia should be structured, gradual, and individualized. Students can benefit from explicit letter-formation instruction, multisensory practice, large-movement activities, visual writing guides, adapted paper, spacing supports, short practice sessions, and meaningful writing activities.
A useful progression is:
Movement → Letter → Word → Phrase → Sentence → Functional Writing
At the same time, students should have access to accommodations such as typing or speech-to-text when handwriting is not the primary skill being assessed.
Most importantly, handwriting difficulties should not be treated as a measure of intelligence or effort. A student with dysgraphia may have excellent ideas and strong academic understanding while finding the physical act of writing difficult. The best approach combines targeted practice, reasonable expectations, positive feedback, appropriate accommodations, and gradual development of independence.
